39 Tables
What Are Tables?
Tables: In this context, we are referring to data tables, which are tables that include row and/or column header information to categorize content)
File types: .doc, .html, .pdf
Are Your Tables Simple or Complex?
A simple table includes a maximum of one header column and/or one header row. A complex table includes more than one header column and/or header row, and may include merged or split cells. [11]
We recommend you make every effort to keep data tables as simple in structure as possible. The more complex the design of a data table, the less accessible it will be for some students using screen-reading technology to access their textbook materials. Screen readers move left-to-right, top-to-bottom, one cell at a time, and because a screen reader does not repeat a cell, merging or splitting cells may affect the reading order of a table.
Before You Begin
Who Are You Doing This For?
This work supports students who:
- Are blind or have low vision.
- Have a form of cognitive disability.
What Do You Need To Do?
In the same way that your content hierarchy needs true headings and structure, tables need a properly defined structure to be accessible. This means that you must add row and column headers to define the different sections of data. Screen readers read tables horizontally – cell by cell, row by row – and row and column headers help give the context of the data in each cell to students who are blind, have low vision, or have a cognitive disability.
Creating Simple Tables
A simple table includes:
- A table title or caption
- Maximum of one row of column headers and/or maximum of one column of row headers
- No merged or split cells
- Adequate cell padding for visual learners.
Example:
| Color Family | Bulbs | Shrubs | Trees |
|---|---|---|---|
| Pink | Tulips | Flowering currant | Ornamented plum |
| Yellow | Daffodils | Forsythia | Star magnoli |
This table is simple. Reviewed against the preceding requirements list, this table:
- Includes a title (Spring Blossoms)
- Has one row in which cells are tagged as column headers (Color Family, Bulbs, Shrubs, Trees), and one column (beginning on the second row) in which the cells are tagged as row headers (Pink, Yellow)
- Contains no merged or split cells
- Has adequate cell padding to provide space buffering around the data in each cell. (Cell padding in this table is set at “3”).
For a student accessing the table through a screen reader, the first row of data will be presented along the lines of:
Pink, Bulbs: Tulips
Pink, Shrubs: Flowering currant
Pink, Trees: Ornamental plum
How tos
WordPress (UBC Blogs) - In order to add tables in UBC Blogs through visual editor, activate MCE Table Buttons
Adding tables in UBC Wiki
Adding Tables in Canvas
TablePress Plugin
TablePress is a plugin used to quickly create and manage tables, and is an extremely user-friendly interface as no coding knowledge is needed. It allows for numerous types of data like text, numbers, links, images, math formulas, etc. to be easily added. TablePress is an important tool to use when creating tables because it ensures that textbook content is accessible to the greatest number of people possible. There are certain features like searching, pagination, etc. that can be enabled at the click of a button, but using these features may affect the accessibility of your table. Learning how to best use TablePress is quick, and ensuring accessibility is invaluable!
Using the TablePress Plugin
First, go to the textbook you want to edit and check your dashboard on the lefthand side in PressBooks for TablePress. If it is not listed, you will need to enable the TablePress plugin.
- Click Plugins in the lefthand dashboard
- Look through the list of plugins until you find TablePress, and select Activate
- TablePress should now be listed on your dashboard
Create a Table
To create a table, click TablePress > Add New Table. Here, you can give your table a name and a description. You can also select the number of rows and columns for your table. Once you enter this information (you can adjust them later if needed), select Add Table.
Notice that a table ID and shortcode has been created for your table. The shortcode should read as table id=1/, indicating that this is the first table you've created in your book. Thus, the next table you create would have the shortcode table id=2/.
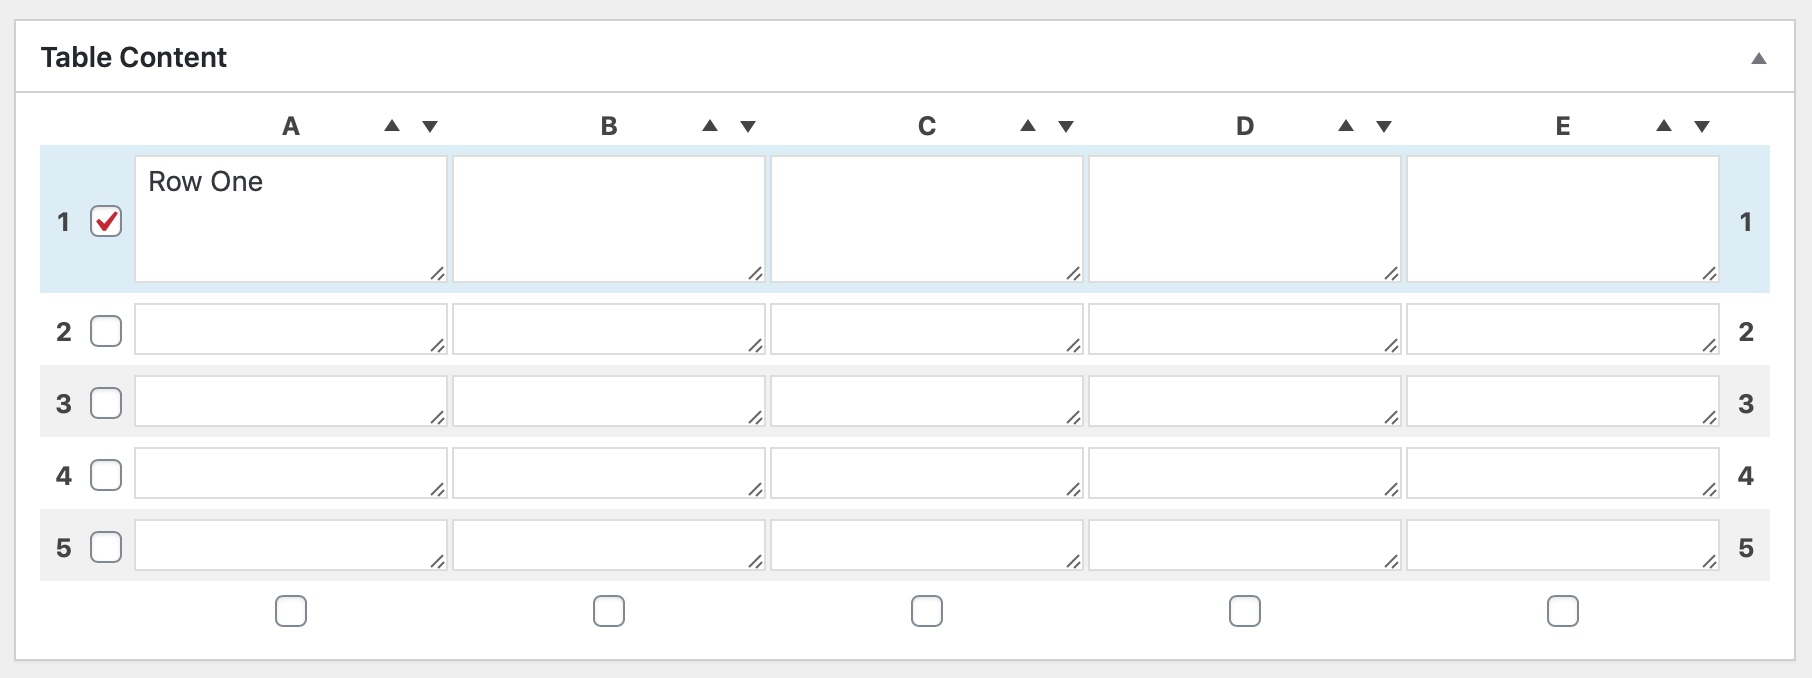
Now, you can add your table content by simply clicking the cell and row blocks and typing. Remember to Save Changes as you work!
Table Manipulation
You can adjust your table by adding or deleting rows. Determine which row you would like to be deleted, and select the square to the left that aligns with the row.

Then, underneath Table Manipulation, click Selected rows: Delete to remove the row from your table.
 This is also where you can insert links and images. As you can see, TablePress is flexible with adding, deleting, or duplicating rows, columns, and content.
Ensuring Accessibility
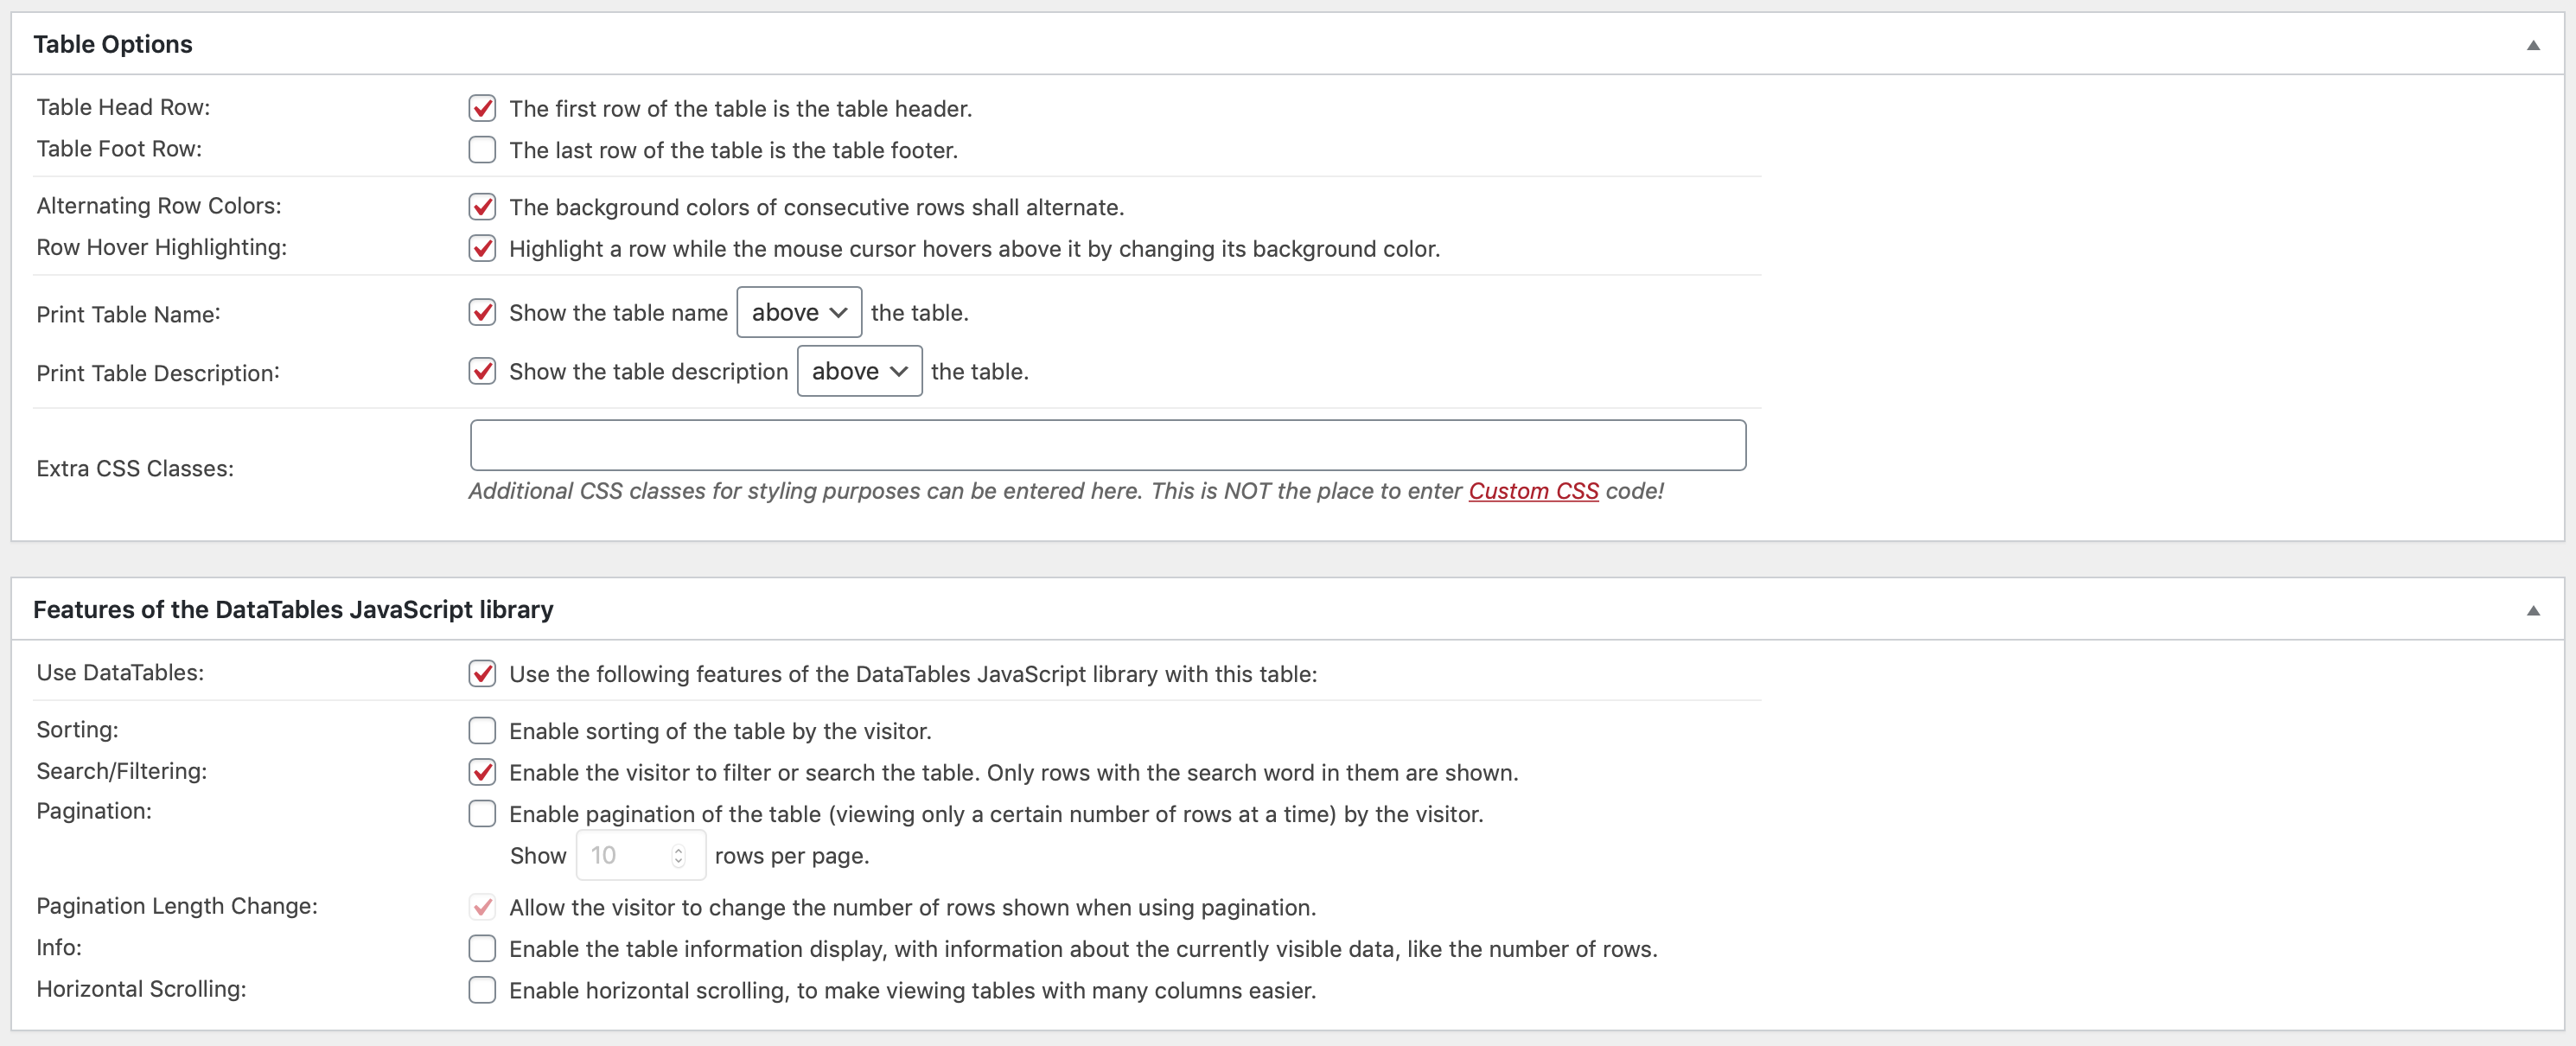
To create accessible tables, you must be careful about the features you check and uncheck.
Table Name: Tablepress Accessibility
Table Description: Table layout of default TablePress settings
| Table Feature (in the order TablePress shows them) | Default setting |
|---|---|
| Table Head Row | Check |
| Table Foot Row | Uncheck |
| Alternating Row Colors | Check |
| Row Hover Highlighting | Check |
| Print Table Name | Check (above) |
| Print Table Description | Check (above) |
Table Name: Features of the DataTables Javascript Library
Table Description: Table layout of default DataTables features
| JavaScript Library Features (in the order TablePress shows them) | Default setting |
|---|---|
| Use DataTables | Check |
| Sorting | Uncheck |
| Search/Filtering | Check |
| Pagination | Uncheck |
| Pagination Length Change | Check |
| Info | Uncheck |
| Horizontal Scrolling | Uncheck |

Adding your Table to a Page
When you are finished creating your table, copy its shortcode and navigate to the book you would like to add your table to. From here, you can paste the shortcode on the page where you want the table to exist.

Edit an Existing Table
If you want to edit the table after its in a page, there's a few routes you can take.
- You can edit your table from the TablePress plugin. Changes made will automatically update the table on your page to the newest saved version. Make sure that the shortcode of your table is the same as the shortcode on your textbook page, or the link will be broken.
- You can edit your table in your textbook page. Click Preview to view your page as an Admin and click Edit underneath the table you want to edit. This will automatically redirect you into the TablePress plugin where you can make your changes.
Importing a Table
To import a table into TablePress, go to the TablePress plugin and click Import. Your input can be one of the following file formats: CSV, HTML, JSON, XLS, or XLSX. This feature is useful if you have a large table because it will save you from having to manually enter every piece of data, which in turn saves you time.
 If you import a table and there are some errors, you can manually change the cells that are incorrect. You can also choose to import it as a new table, to replace an existing table, or to append rows to existing tables.
Exporting a Table
To export a table from TablePress, go to the TablePress plugin and click Export. You can export the file into the following formats: CSV, HTML, or JSON. Select the table you'd like to export and click Download Export File.
 Now, you have the data table downloaded to your computer that you can share with others.

